
Contents
Noctorna HQ
Once you’ve played through all of the cutscenes, you’ll wake up outside a thoroughly changed Noctorna HQ. The only familiar faces by your side are Ashe and Faahlda. Ashe tells you to speak with Faahlda, so go ahead and do so (Pic 92 will also be unlocked in the Picture Gallery). Faahlda will reveal her true Guardia form to you and share with you a bit about her power. You won’t have much time to chat, as a screaming villager rushes toward the three and exclaims that Mor Town is under siege by ghouls! While Mila and Ashe rush toward the town, Faahlda stays behind. Something feels off with her…
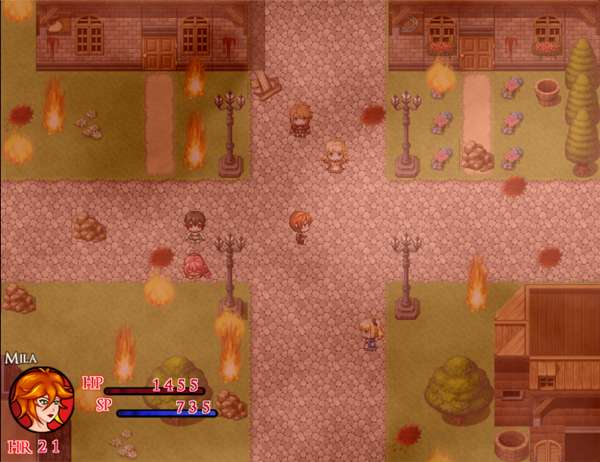
Mor Town is indeed on fire and crawling with ghouls! You’ll need to destroy all the ghouls in Mor Town Center to move on. Feel free to use your best skills to clear them out quickly. If you run low on SP, there is a chest of supplies by the general store to fully restock as often as you like. Before taking out the last ghoul, be sure your SP is topped off and you equip any fire resistant gear if you have it. A boss fight will immediately commence after the last ghoul is dead.
- Faye
- Max HP: 9,400
- Ellenore
- Max Hp: 3,700
- Bianca
- Max Hp: 1,900
It turns out the ones behind the attack on the town were Faye and her minions! If you killed Bianca the bookworm vampire at any point in the story, she will join the other two in this fight. Faye has been given the power of fire and she will use it often. Ellenore and Bianca will serve as backup. Bianca will continuously buff her allies while Ellenore the librarian uses Faye’s old moveset to constantly pelt you with debuffs. These can be a deadly combo, so try and take them both out quickly before you get overwhelmed. With the other two out of the way, the fight becomes much more manageable. Just be aware that like in the first fight, Faye will announce she is using her strongest attack as she is close to defeat. Guard to get past this, otherwise, you’ll get paralyzed!

With the vampires defeated, Faye drops a mysterious glowing shard. Faye warps and snatches it from Mila’s hand and it turns out to be incredibly important! After a few cutscenes, she explains to you that what you picked up was a Polarisphere Shard, a piece of her Guardia power essentially. If all of the pieces can be returned, Faahlda’s power can be restored and she would be allowed to assist Mila. She mentions there being a test after all the pieces are collected, but for now, your job is to find all these shards. How will you do that exactly? Faahlda’s got you covered. She hands you the Fractured Polarisphere and with it you can better gauge where these shards are hidden. Pic 101 is also unlocked in the Picture Gallery.
It should be noted that the overworld is now dark and Mor Town is in rough shape. All of the shops are thankfully still open though and you can still complete contracts as normal. You can talk with the citizens if you like, but if you go to Mor Town East, there is a woman there who tells you she was bitten by a ghoul during the attack. If you give her holy water, you will heal her and she will give you an Ammo Pouch as a reward. If you continuously deny her holy water, she will eventually turn into a ghoul herself, so be sure you have one on hand unless you want to miss out on the reward.You can also speak with David Reeder in Mor Town North for a free Viribus Laurel.
Returning to the main content, there are three polarisphere shards to collect in total and you can obtain them in any order you like. You will be returning to former areas and some new ones. It should be noted that previous areas have been repopulated with stronger versions of enemies, which have a higher drop rate of vampire materials. If your level is low or you feel like you are underpowered, it may be a good idea to take out some of these enemies before jumping into the upcoming boss battles.
The First Shard

(If you picked up the Rubber Bodysuit from the Slime Cave near Fallholt, you’ll have a big advantage in this upcoming section.)
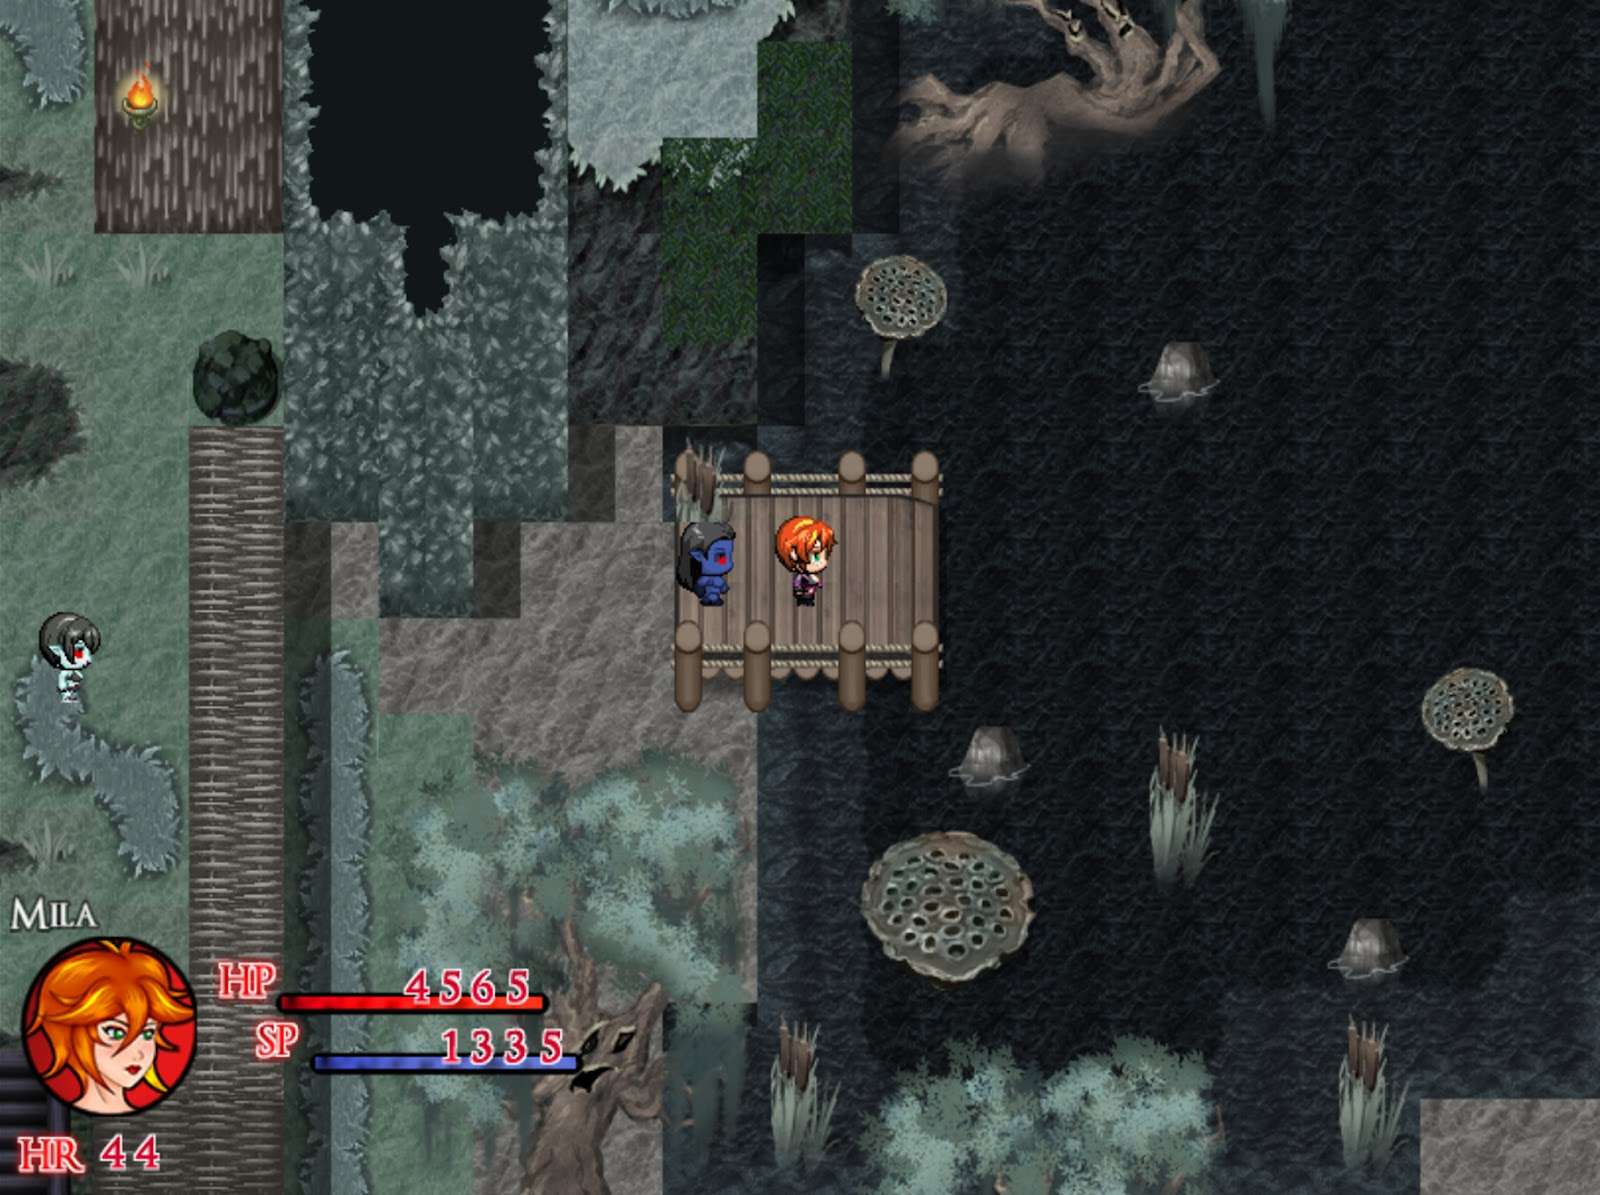
Head or warp to Humilem village. The vampiric cult has returned and they are now capable of doing a pretty powerful water attack against you. If your magic defense is low you’ll want to watch out! Enter the church to find an ominous green portal. Entering it will place you in a demonic, slimy sticky looking cave, filled with familiar vampiric tentacles.
This cave is a small maze and tentacles will attempt to grab Mila from the ceiling and walls. There are no items to find here, so it’s all a matter of navigating to the end of the maze. It’s relatively straightforward, but if you find yourself getting lost, check out the map below.

Your goal is to reach the room on the upper left hand side of the map. Once you get there, the Polarisphere will warn you that the boss fight is up ahead. Save and restore your health and supplies, then walk through to watch the cutscene and the fight will begin.
- Viviene
- Max HP: 8,500
- Iris
- Max Hp: 5,700
Iris has learned how to manipulate the tendrils herself. Because of that, each of these ladies will be able to act multiple times per turn and unlike the first Viviene fight, you won’t be able to slash off the tentacles to weaken her. As a matter of fact, Viviene’s water based attacks will be weakening YOU. Well, your defenses anyway. While both of their attacks start off relatively weak, this can change once the debuffs start piling up. One thing to note, if Viviene’s HP starts falling below Iris’, Iris will actually take the damage instead. Your best way of getting around this is to either focus on defeating Iris alone first, or using the Cross skills to attack both of them at once.
Once Viviene falls, you will obtain the first Polarisphere Shard. Iris will be returned to her old mental state and there will be a touching scene before you are given 5 minutes to get to the exit. A rather generous amount of time to escape. Though you can just leave immediately, continuing to talk to Iris will allow you to take her with you! You’ll move much slower out of the cave, but there are no more enemies to interrupt you. Whether you choose to take Iris with you or not, once you’ll be warped outside of the church. A job well done!
The Second Shard

Warp to Fallholt and by the residential district in the west side of the city is an NPC named Vladislav Vetrov who will give you an Ultimus Laurel for speaking to him. He’ll mention strange winds coming from the east, so leave the town, following the trail that leads east. The Tundra Trail is an area that was inaccessible before due to the strong winds. While the weather is still breezy, you are now able to enter and explore the place.
This area contains a new enemy type, the Fuyukiba. These icy vampires have a tendency to leave behind frozen husks of their victims, but they occasionally turn those that they like into vampires like them. These enemies sport a high magical attack stat, and their ice attacks can deal a lot of damage, so be aware of that if you decide to engage with them. Also, every few seconds, there will be a strong wind that blows through this map, obscuring your vision, and causing Mila to move slower and take a bite of damage.
This area has a few chests for you to collect. Inside you can find a Sapphire in the chest closest to the west, a Silver Ore in the chest towards the center of the map, and a chest containing 850 gold towards the east. In the southeast corner of the map, you can also find a cave. Inside, there are a bunch of frozen corpses, but more importantly, a chest containing a Fuyukiba Gown. This piece of equipment protects against ice and wind based attacks and will be helpful in the upcoming boss fight.
If you return to the Tundra Trail and follow the path heading east, you’ll reach the Tundra Tower. This winding tower is seven floors tall and as you continue to climb it, you’ll find it to be the home of the bat-like Frost Baitelle. These airborne enemies are fast and susceptible to silver and piercing damage. Though technically not undead enemies, they will resist Light based skills, so keep that in mind. Once you’ve climbed up to the top of floor 6, you’ll get a warning right before entering the boss room. Save and restore yourself with items and head through once you are ready.
- Charlotte
- Max HP: 13,000
- Vampire Elite Soldier
- Max Hp: 4,500
- Vampire Elite Maid
- Max Hp: 4,700
Once again we come face to face with the former mayor of Mor Town. This time, she has some back up and the power of wind behind her. Her power of wind blows away any buffs you place on yourself, so don’t waste your precious LP on buffs. Speaking of LP, the Vampire Elite Maid is able to tease Mila, causing her to lose all of her LP as well as buff her allies and debuff your speed. With such low defense, the maid should be your first target to get a better control of the battle. The soldier, while sports the highest defense of the three, and focuses on physical attacks. He can be brought down fairly easy with some Bomb skills.Charlotte’s health is pretty high, but her defense is poor. Keep your health high throughout this battle so that Charlotte doesn’t catch you off guard with an unexpected third action during her turn! Once the three vampires are beaten you will obtain the second Polarisphere Shard. Pic 102-103 will also be unlocked in the Picture Gallery.
The Third Shard

Warp to the Lingrave Clinic and enter it. You’ll find an off putting surprise as you walk in. Amber will attack you, but she just stares you down. There’s no way to lose this fight, so just defeat her quickly to move on. After the fight, Amber will run off to the west wing of the clinic and you must give chase. The polarisphere will resonate when you are in the right direction, so enter the room to the southwest corner of the hall. Once you enter, the door will be locked behind you and you’ll be trapped in a room with two WIghts, a new enemy type.

The Wights are similar to Nachzehrer in their high attack stat and skill set. One of the differences is that they have a high libido. If you are at half health, they will become dazed while staring at the weakened Mila. However, if your health reaches below 20%, they will attempt to mesmerize Mila out of a turn. This can be devastating if it lands, so be sure to keep your health topped off whenever you can. Once both of the Wights in the room are beaten, the door will unlock and a bat will fly out of the room you were in and the Polarisphere will resonate accordingly. Chase after the bat, heading towards the eastern wing of the clinic, but be aware that the clinic is now infested with multiple Wights that will chase after you if they make eye contact!
Enter the ritual room where you first faced off against Morgan in Chapter 4. There, you will see Amber once again. Defeating her in this second encounter will reveal that she was seemingly made of some sort of mud. Save up and heal, then proceed into Morgan’s bedroom to start the next boss fight.
- Morgan
- Max HP: 9,800
Morgan, like in her first fight, is a boss that attacks you with sheer numbers. She starts the fight with Mud Soldiers at her side, but she will soon summon ghouls as well. While the ghouls can be destroyed easily enough, the Mud Soldiers are immortal as long as Morgan is alive. Don’t waste your attacks by targeting them! Morgan still has her old moveset of dark magic, but she can also use Earth based moves, which deal a substantial amount of damage, even when guarding or if your defense is high. Since Morgan is a vampire now, she is also susceptible to their inherent silver weakness, so use dagger skills to weaken her (Or Count Vorigan’s Cane if you have it!) If she has her ghouls out, attack them with the Cross skills and then use the Axe skills to deal high damage to her quickly! Once Morgan is down, she’ll drop the last Polarisphere Shard, but not before spitting out some ominous words about her Mistress, Gabrielle. Pic 104-107 will also be unlocked in the Picture Gallery.
The Test of Resonance
Once you have collected the 3 Polarisphere Shards, you will be warped back to Noctorna HQ.

Using her power, Faahlda reunites all of the shards and restores the Polarisphere and her power back to full strength. Now there is just one more task you need to complete before Faahlda will assist you. Pass the Test of Resonance. To do this, you’ll need to defeat her in battle. If you feel that you are underleveled for this point in the game, Faahlda will continue to increase your level like normal and while the fight can be tricky, there is no consequence for losing, aside from having to start from the beginning. Once the scene with her is done, you will also unlock Pic 108 in the Picture Gallery.
- Faahlda
- Max HP: 15,000
Faahlda is resistant to all skill types outside of your standard whip skill, which she is slightly weak to. If you either obtained the Double Band from the Casino or the Dual Strike skill from the lamia contract, you’ll have an edge in this fight. You’ll also want to upgrade your whip as high as you are able to at this point to deal the most amount of damage possible. Faahlda’s attacks of note include a light arrow attack which strikes multiple times but has low accuracy and a skill which heals Faahlda when it lands. The last important factor to this fight is Faahlda’s ultimate move. She will activate an invincible form about every 5 turns or so and it will last 1-2 turns. While in this form, she will attack you with a devastating move that will likely end the fight if your health is low and you aren’t guarding. Your LP will likely remain high throughout the fight, so use any Light Skills you’ve obtained throughout the game to your advantage. Compassionate Soul is helpful to reclaim some HP lost after Faahlda’s ultimate and Brave Soul will increase your damage output. Try and time the use of these skills to the turn you think Faahlda will activate her invincible form!
Once Faahlda is defeated, her power will join with Mila and you will obtain her old Polarisphere. Faahlda also provides you with two new skills. Summon Faahlda will allow you to call Faahlda’s power in battle, raising all of your stats while the effect is active and providing you with an auto-life effect! If you fall in battle, you’ll automatically be revived once while it’s active! The second skill you will get is Call Faahlda. This skill is used outside of battle and allows you to spend your vampire materials to level up from anywhere! After this, Faahlda will also provide you with an overall stat boost!
This scene is then interjected by Ashe’s arrival. Through some exposition, Ashe explains that the secret to defeating Amber’s newfound power is to restore the Virgin’s Cross. The Virgin’s Child, which had been missing, is explained to be hidden in Mila’s mother’s grave. Beneath the grave is a ladder leading into the crypt. Once you are ready for another fight, proceed down.
Inside the crypt, it turns out that Mila’s mother is not dead, but rather undead. She is a vampire and has been sleeping silently inside of the crypt, kept dormant by the power of the Virgin’s Child which rests behind her. As soon as her mother gets a whiff of her scent, she springs to life and unfortunately for Mila, she will have to destroy her mother, who has become a mindless servant of Gabrielle.
- Selina
- Max HP: 8,000
Selina is an absolute joke of a boss after all the fights you’ve gone through. WIth Faahlda’s power, you should be able to make short work of her. Selina doesn’t have much experience as a vampire since she’s been asleep for most of it. All of her attacks are basic fare, so there isn’t anything she can throw at you that should come off as a surprise.
Once Mila’s mother is taken care of, you will return to the surface after another cutscene. Ashe will return to Mila the fully restored Virgin’s Cross and then leave your side once again. The Virgin’s Cross is actually a handy tool for taking down a certain powerful boss. You can use it in battle and while it’s effects are active, your resistance to Dark based skills is increased dramatically. Pic 109 will also be unlocked in the Picture Gallery.
You have all you need to take on Amber and with that, Faahlda creates a bridge of light, allowing you to reach the floating castle at last!
Castle Noctorna
Welcome to the last stretch of the game! This castle contains some of the strongest enemies the game has to offer, but also plenty of opportunities to make Mila even more powerful! The main distinction that sets this dungeon apart from other areas of the game is that all of the enemies you defeat (aside from bosses) respawn shortly after you defeat them. If you feel the need to grind to gain some levels, this is the place to do it.

As you walk into the first room of the castle, a cutscene will play where you will once again meet with the mysterious antiques dealer. After a rather ominous conversation about the nature of the castle and creating a store inside of a literal hole in the wall, he hands you a Shop Card. The castle is a vast labyrinth that can disorient you if you aren’t careful. This consumable can be used at any time within the castle to quickly warp to the shop, so use it in case you ever get lost or want a quick way to leave. There you can purchase more Shop Cards, laurels, consumables, and some unique equipment. You can even sell at this store too, so you have all your bases covered! Another thing to note is that you can also restore your SP for free within the shop. If you ever run low while exploring, the shop is your haven! After the scene, head forth into the castle!
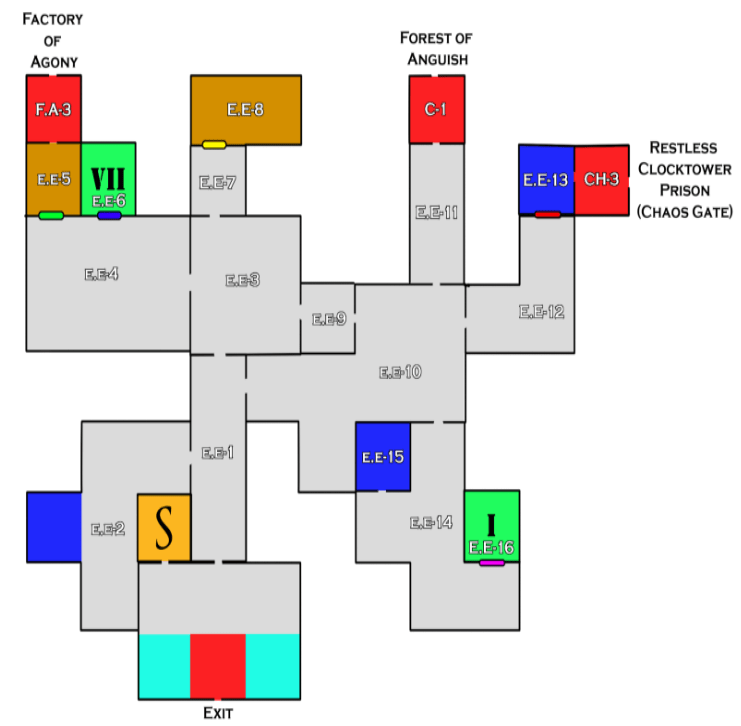
Since the castle is broken into multiple areas, I will be covering these sections a bit differently, so that you don’t miss any items. For each section, I will be listing the collectibles items that can be found in each room, whether it is in a chest, barrel, jar, or hidden somewhere in the room, followed by the area map, and then the walkthrough of the area itself.
A Red Room indicates an Entrance/Exit. An Orange Room signifies that there is something noteworthy in the room. Blue Rooms indicate that there is a chest to be found. Light Blue Rooms indicate that it is a warp room (a key item is required to use them). Green Rooms indicate that it contains a False Memory (See The Forbidden Memory for more details). The room with the S is the Shop and certain rooms with a colored barrier at the entrance mean a specific boss must be defeated to open it. Yellow barriers require other means to open them.
Entry to Entropy
This first area gives you a taste of what to expect in the castle moving forward. As you explore, you’ll notice that there are many doors with jewels in them that cannot be opened. Keep a mental note of them (or just refer to the map) because they will become accessible as you clear certain challenges within the dungeon.

At the moment, there aren’t many rooms you can access here, as most are blocked off by the aforementioned jeweled doors. Check the map to grab the goodies that you can, particularly the Castle Noctorna Map! Each area has it’s own map to collect, whose pages will be added to your map as a whole. You can quickly access the map outside of the menu by pressing (PgUp on PC). Once you are ready, head toward the north east corner (EE-11) to proceed to the next area.
Items:
- EE-1 90 Gold
- EE-2 Medicinal Herb
- EE-2 30 Gold
- EE-2 Holy Water
- EE-2 Liquid Silver
- EE-2 Diamond (Gold Chest)
- EE-2 Castle Noctorna Map (Blue Chest)
- EE-3 Celeritas Laurel
- EE-3 Holy Water
- EE-4 Mighty Tea
- EE-5 Castle Travel Widget (Purple Chest)
- EE-9 Jade
- EE-9 60 Gold
- EE-10 250 Gold
- EE-11 Garnet
- EE-12 Sunlite Tea
- EE-12 Moonlite Tea (Teapot)
- EE-13 Ultimus Laurel (Chest)
- EE-14 Silver Ore
- EE-15 Elixir
- EE-15 Silver Ore
- EE-2 Blaze Earrings
Forest of Anguish
This area is much larger than the last and with a greater variety of enemies too, The Forest of Anguish is also the first area that houses a Chaos Gate. Chaos Gates are like the transition rooms we used to get to from the last area to this one, except when you enter, the colors are inverted. Without a Chaos Canceller, you’ll be repeating the room indefinitely. Once you do have it, the Chaos Gate can transport you to a totally separate part of the castle! This can open up the way to shortcuts later on, as well as useful items.
Same as the last area, many routes are still blocked off, so collect all the items that you can and also be sure to visit room FA-16. This warp room is still inaccessible, but once you do have the ability to warp around the castle, you will be able to warp to any of the rooms you previously visited. It’ll be worth the trip to check the room out once! In room FA-5 there is a locked door that can be opened by pressing a green switch hidden behind a small hedge. Also notable here is room FA-10, which has the first appearance of Leap Panels. Once you obtain the Leaping Anklet, you can use these panels to hop around the map to additional areas! Keep FA-10 at the back of your mind, as there is a useful item beyond these high hedges!
Items:
- FA-2 Vulnerary
- FA-2 25 Gold
- FA-2 110 Gold
- FA-2 Viribus Laurel
- FA-3 Supply Cache (s)
- FA-6 Castle Noctorna Map (Blue Chest)
- FA-7 Holy Water
- FA-7 50 Gold
- FA-7 Medicinal Herb
- FA-11 200 Gold
- FA-12 Relic Earrings (Chest)
- FA-13 Praesidio Laurel
- FA-14 70 Gold
- FA-14 Prison Key (Chest)
- FA-18 Antitoxin
- FA-19 Antitoxin Suit (Chest)

Solitary Conservatory
This area will be the first in the castle where your path can diverge. Though you can leave this area through the exit on the third floor towards the Forsaken Cathedral, this guide will assume you are completing this area first then heading towards the Abolished Aqueduct. That being said, this area has a cutscene as soon as you walk into it’s second area! Maye is being chased by some lesser vampires on the upper floors. You have to head to her to proceed… but she can wait while we explore the area a bit.
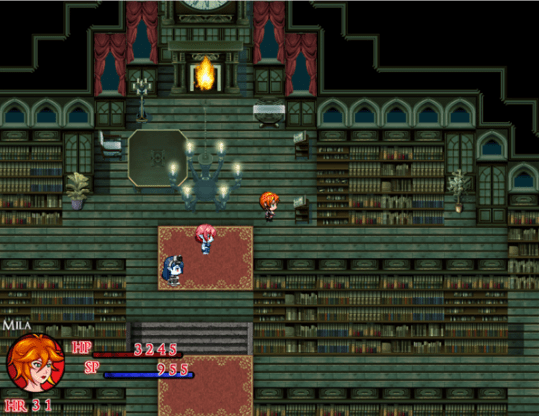
In this first hallway there are some rooms with a glowing book. If you read them, you’ll get a bit of lore, but more importantly, these passages contain a clue to a puzzle into a room up ahead. You are meant to figure out a code, similar to the puzzle in the Cliffside Library. In room FA-20 there is a gold door which requires a code. By using the words in the books as a clue, we can infer that the code is 524. Within, you will find the first of the False Memories. This one will only appear if you have completed Contract 13. See the Forbidden Memory for more details on this fight.
When you are ready to proceed, make your way to the third floor, Room SC-27. The room just before has a chest to restore your SP, so use it if you need to. Once you get to the room, it turns out that Maye was already turned into a vampire before you arrived. She and the other members of Noctorna were turned into Amber’s servants and they are looking to add Mila into their ranks….
- Maye
- Max HP: 20,000
Maye’s signature attack is sending her bats to attack you. Since she uses it fairly often and attacks multiple times a turn, the damage can rack up fast. A funny way to use this to your advantage is to equip either the Revenge Plate, or have the Wicked Child as your whip. Each time you are hit with a bat, there’s a small chance of counter attacking, and this can occur multiple times per turn! Maye will waste some of the early fight laughing at you, so use that time to your advantage by buffing yourself with Faahlda or any of your light skills. Once Maye is defeated, you’ll watch another cutscene with a cryptic vision, followed by a mysterious hooded shadow.
The shadow will disappear into the darkness before Mila can reach it, but once the scene is done you will be able to open all of the Blue Doors across the castle! You will also unlock Pic 112 in the Picture Gallery. Open up the blue door ahead which leads us to a room with useful keys! Inside the chest is the aforementioned Chaos Canceller as well as a lever that will move the bookcase in SC-13. With that done, we have access to the Abolished Aqueduct, although you can also backtrack to the Forest of Anguish to go through the Chaos Gate. If you do so, it will lead you to a frozen area of the Aqueduct with a gold chest containing either a Viribus Laurel, or Explosive Educations if Bianca was killed at any point.
Items:
- SC-1 Holy Water
- SC-3 Amethyst Shard
- SC-4 Ammo Pouch
- SC-4 Dragonscale Plate (Chest)
- SC-6 Prism Core (Chest)
- SC-16 55 Gold
- SC-17 Castle Noctorna Map (Blue Chest)
- SC-17 Celeritas Laurel
- SC-19 Mighty Tea
- SC-22 Sapphire Shard
- SC-22 Supply Cache (M)
- SC-24 95 Gold
- SC-24 Holy Water
- SC-28 Chaos Canceller
- SC-30 140 Gold
- SC-30 110 Gold
- SC-30 40 Gold
- SC-30 80 Gold
- SC-32 85 Gold
- SC-32 Antitoxin
- SC-32 35 Gold
- SC-33 Garnet Shard


Abolished Aqueduct
The central gimmick of this area is in AA-2, marked in orange for your convenience. In this room there are three valves that control several bridges throughout the aqueduct. You can only have one active at a time, so if you want to fully explore this area, you’ll have to return to this room often. The color of the walls should help you get your bearings as well as remind you which are the bridges you need to open next.

If you would prefer to make a bee-line to the next area, the valve you want to turn is the Blue one. Also, should you decide to explore and run low on SP, you can return to the central room, AA-15 for an SP restoring chest!
Items:
- AA-1 65 Gold
- AA-1 Supply Cache (s)
- AA-1 Holy Water
- AA-3 Castle Noctorna Map (Blue Chest)
- AA-3 20 Gold
- AA-3 Medicinal Herb
- AA-3 15 Gold
- AA-3 40 Gold
- AA-3 Praesidio Laurel
- AA-3 100 Gold
- AA-4 Moonlite Tea
- AA-4 Mighty Tea
- AA-5 Supply Cache (M)
- AA-5 70 Gold
- AA-8 Explosive Educations (If Bianca is dead)/Viribus Laurel (if not) (Gold Chest)
- AA-9 Holy Water
- AA-9 Sacred Elixir (Chest)
- AA-11 Rubber Body Suit (Chest)
- AA-12 120 Gold
- AA-12 Tourniquet
- AA-12 Ammo Pouch
- AA-15 Felix Laurel
- AA-15 30 Gold
- AA-15 Vulnerary
- AA-15 40 Gold
- AA-15 15 Gold
- AA-15 Amethyst
- AA-15 Ring of Winds (Chest)

Factory of Agony
As it’s name implies, this factory can be a bit of a pain, particularly it’s lower floor that is filled with spikes! The factory itself is a dead-end, however there is an elevator we can use to get to other parts of the castle. Unfortunately it’s out of power. You need to give it some juice by locating three Energy Cells scattered inside of green chests.
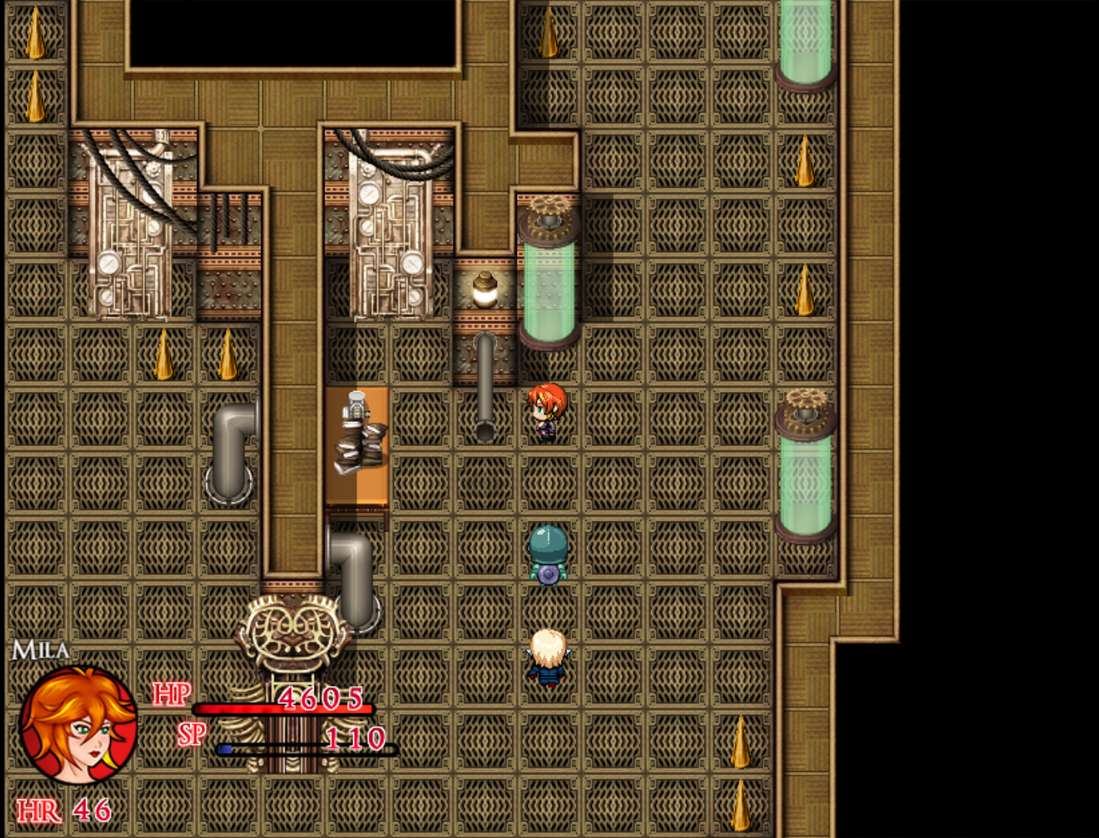
These Energy Cells then need to be returned to the power generator found in FA-5. Two of the Energy Cells can be gained rather easily. The first is tucked away at FA-8. From there you can go downstairs via FA-9 to reach FA-13, where you will need to move an iron ball on top of the switch to unlock the door to FA-14. The last one is tricky. You’ll need to have obtained at least 1 Energy Cell before attempting to get this one. At the north end of FA-18, there is a power conduit where you can insert one of your Energy Cells. Do so, then flip the lever which opens the door on the south side of the room. You’ll only have 25 seconds to get there before the power shuts off and you’ll have to try again. If you fail, you can take the conveyor belt back to the north end of the room without having to walk all the way around. If you are having trouble with this section, you can return once you have the Leaping Anklet, which gives you access to some shortcuts to make this challenge a bit easier. Once you get the third Energy Cell, don’t forget to take the one you inserted into the power conduit!

With all that done, return to FA-5. Insert all the Energy Cells in their conduits and flip the switch. Voila! The power has been restored! The elevator is now accessible… or it would be, if it wasn’t for the next boss encounter!
- Bridgette
- Max HP: 21,000
Bridgette is speedy, but lacks defense. She tends to jump up like a Baitelle and attack from the rafters. Also watch for her Bombga skill. Equipping Fire-resistant equipment could help you in this fight! Once she is down, heed her advice and return to the first floor. Back in the Entry to Entropy, you will finally gain the Castle Travel Widget. Warping Across the castle is now possible! You will also unlock Pic 114 in the Picture Gallery upon defeating Bridgette.
Items:
- FA-1 40 Gold
- FA-1 30 Gold
- FA-4 130 Gold
- FA-5 Holy Water
- FA-5 Supply Cache (L)
- FA-6 Shop Card
- FA-6 Vulnerary
- FA-6 200 Gold
- FA-7 Viribus Laurel
- FA-8 Power Cell (Green Chest)
- FA-9 Ruby
- FA-9 Supply Cache (M)
- FA-10 Tarnhelm (Gold Chest)
- FA-11 Elixir
- FA-11 Jade Shard
- FA-12 Salutem Laurel (Chest)
- FA-14 Power Cell (Green Chest)
- FA-17 Sunlite Tea
- FA-17 Castle Noctorna Map (Blue Chest)
- FA-19 Ammo Pouch (Chest)
- FA-20 Power Cell (Green Chest)


With two jeweled doors unlocked and the Castle Travel Widget in your hands, now might be a good time to do some item clean up around the castle. Having access to the elevator also opens up a couple of other areas, but the one I recommended going to next is the 4th floor, which leads to the Forsaken Cathedral.
Forsaken Cathedral
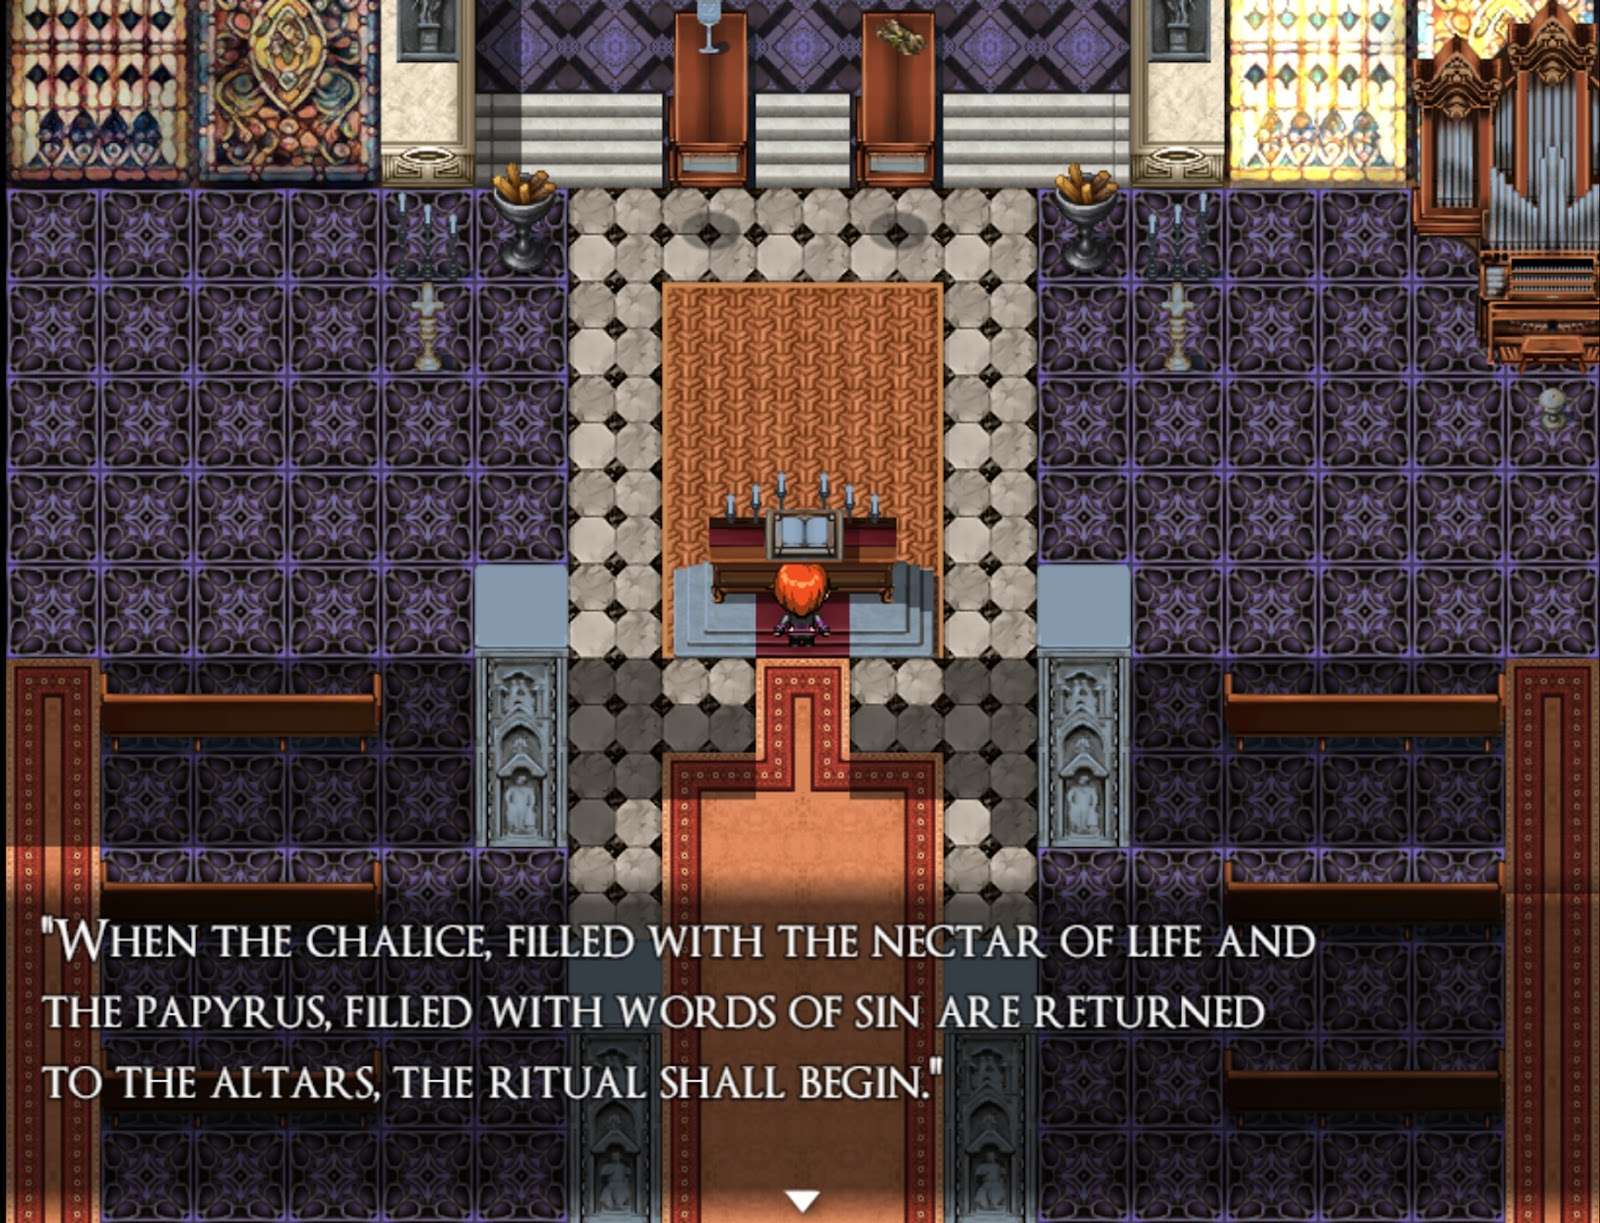
Before you can do anything in this area, go to FC-2 to get both of the ritual items, the Ritual Chalice and the Papyrus of Acknowledgment. You’ll need to take these items to rooms on both sides of the Cathedral to turn them into the Blood Chalice and Acknowledgement of Sin. The rooms are located at the two orange points on the map.

There is also a unique piece of equipment you can earn at FC-9. Press the green button and make your way through the maze to open the chest before the timer runs out to obtain the Mitternachtskleid. With both of the ritual items obtain, return them to the altars from which you got the original items from. Be sure you’re ready for combat, because there’s another boss fight ahead.
- Maria
- Max HP: 24,000
Maria is pretty tanky, with a beefy defense and magical defense stat. She can also boost her defenses further while striking you with hefty light magic. You can drive down her defense with daggers then attack her with the axe skills. Once she is defeated, you will unlock Pic 115 in the Picture Gallery and have access to all the purple doors in the castle. Open up the purple door in the church to get the Leaping Anklet! Enjoy hopping around!
Items:
- FC-1 Holy Water
- FC-2 Supply Cache (L)
- FC-2 65 Gold
- FC-2 Ritual Chalice (Altar)
- FC-2 Papyrus of Acknowledgement (Altar)
- FC-3 Liquid Silver
- FC-3 105 Gold
- FC-3 Garnet
- FC-4 90 Gold
- FC-4 Supply Cache (M)
- FC-5 Ammo Pouch
- FC-5 Moonlite Tea
- FC-6 Elixir
- FC-6 15 Gold
- FC-7 50 Gold
- FC-7 45 Gold
- FC-9 Mitternachtskleid (Chest)
- FC-10 Praesidio Laurel
- FC-11 Leaping Anklet
- FC-12 45 Gold
- FC-12 15 Gold
- FC-12 Moonstone (Chest)
- FC-13 Supply Cache (S)
- FC-13 Holy Water
- FC-14 Celeritas Laurel
- FC-15 Chalice of Blood (Font)
- FC-16 Sunlite Tea
- FC-16 Vulnerary
- FC-17 Medicinal Herb
- FC-17 20 Gold
- FC-17 40 Gold
- FC-17 60 Gold
- FC-18 Salutem Laurel
- FC-19 90 Gold
- FC-24 Salutem Laurel
- FC-24 Viribus Laurel
- FC-24 Praesidio Laurel
- FC-24 Felix Laurel
- FC-24 Celeritas Laurel
- FC-25 Acknowledgement of Sins
- FC-26 45 Gold
- FC-26 Castle Noctorna Map (Blue Chest)


The next area is optional, so if you feel like skipping it, take the elevator to the 9th floor. Otherwise, take the exit through FC-13 in the arena.
Arena of Enmity

This area has a jazzy theme and is devoid of any enemies (for now). Speak with the arena’s host, Immi. She’ll invite you to participate in the arena challenge, which consists of 5 rounds of combat, plus a final round against the champion. You are allowed to use any items and tricks up your arsenal, so feel free to go all out! I’ll be listing the arena fights below.
- The Drip Trips
- The Night Prowlers
- Maidens of the Moon
- Dark Harpies
- Undead Horde
- Arena Champion
- Max HP: 18,000
You’ll need to be careful when attacking the Arena Champion. She has a good chance of counter attacking your blows whenever you strike. She also has a priority move in Knifega, so keep your Health high at all times so that you aren’t caught off-guard. Her physical attack is high, but compared to the other vampire bosses we have fought so far, her HP is low. When the Arena Champion is bested, you’ll be crowned the new Arena champion and unlock the gold doors in the arena area as well as Pic 113 in the Picture Gallery. Be aware that enemies like vampire lamias and hybrids will also roam outside the arena walls now. Take C-8 into the Hall of the Lost.
Items:
- AE-1 Medicinal Herb
- AE-1 30 Gold
- AE-2 Vulnerary
- AE-3 Supply Cache (S)
- AE-3 Medicinal Herb
- AE-3 Supply Cache (S)
- AE-3 Castle Noctora Map (Blue Chest)
- AE-6 Supply Gadget (Chest)
- AE-7 Sunlite Tea
- AE-7 210 Gold
- AE-12 Ammo Pouch
- AE-13 75 Gold
- AE-13 Elixir
- AE-13 20 Gold
- AE-13 50 Gold
- AE-13 15 Gold
- AE-14 Viribus Laurel
- AE-14 Supply Cache (M)
- AE-16 Liquid Silver


Hall of the Lost
Depending on where you enter this area from, some areas may not be open to you immediately. If you enter this area from anywhere other than C-8, you’ll need to make your way over HL-1 and trigger the cutscene there.

We’ve finally caught up with Lucy. Although she’s acting loopy, she hasn’t fully turned, which gives Mila hope that she can save her friend. Lucy runs into the dark portal which transports her somewhere. Mila follows and you are sent to HL-2. The gimmick of this area are the portals that seemingly teleport you all around. If you get lost, consult the map to know where all these portals are taking you. This area also contains a new enemy type: the Verlorenne. These ghosts are immune to physical attacks, so you can only damage them with fire and light based skills.
As you explore this area, there are also some hidden items that can be easily missed. In HL-8, you can trigger a small scene that will boost your Def by 3 by touching the gravestone that is different from the others. In HL-15, if you touch the wall along the raised pedestal, your M. Def will be raised by 3, and finally you can raise your Atk by 3 by touching the unlit candle in HL-19.
Once you’ve made your way around the Hall and are ready to proceed, go toward HL-24 which is a straight shot to the exit of the area, and the “boss”.
- Lucy
- Max HP: 25,000
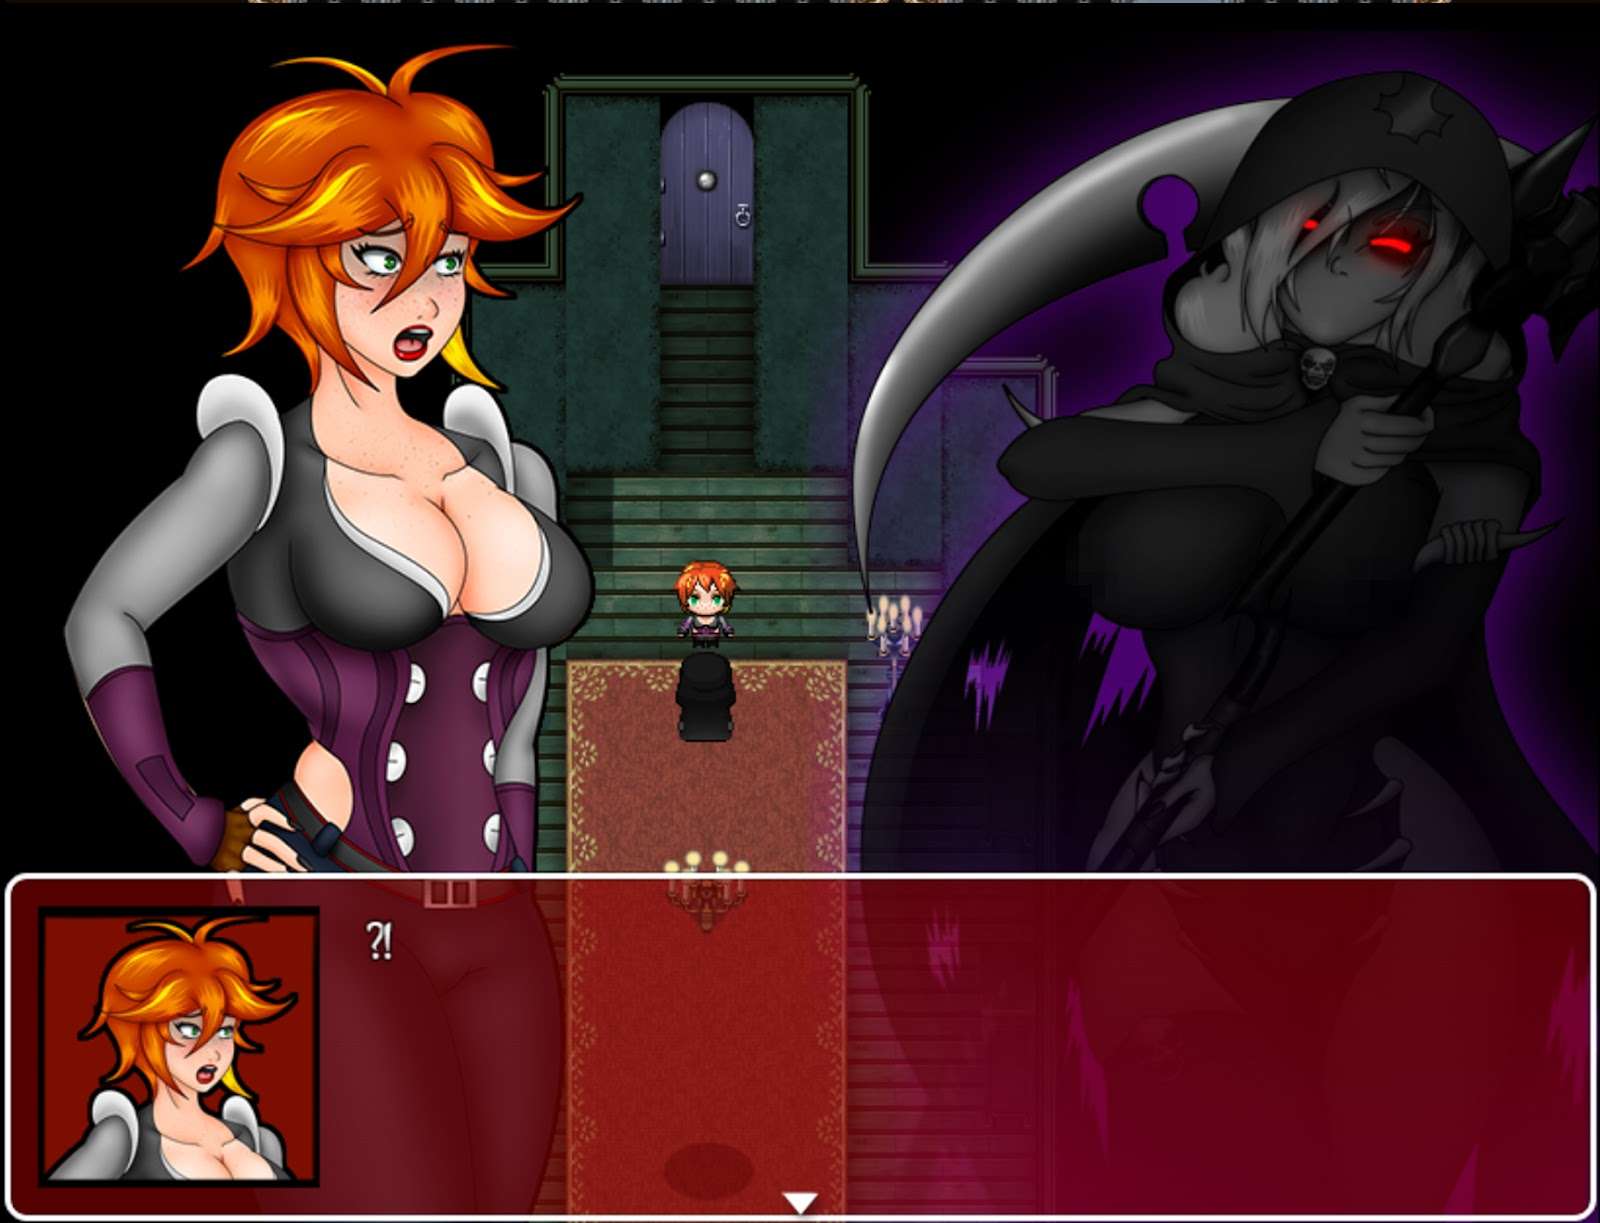
This is a scripted fight, so you won’t be able to actually defeat Lucy here. Her defense is high and all she will do is tease you to reset you LP. After a few rounds, the fight will end and you will be interrupted by the Shadowy figure from earlier. It turns out, this was Gabrielle all along. She commands Lucy to return to Amber and beckons Mila to chase after her. What are you waiting for?! Get going!
Items:
- HL-1 Supply Cache (S)
- HL-3 Celeritas Laurel
- HL-5 25 Gold
- HL-5 Amethyst Shard
- HL-8 Medicinal Herb
- HL-8 +3 Defense (Gravestone)
- HL-9 Supply Cache (M)
- HL-9 140 Gold
- HL-10 Sapphire
- HL-10 Antitoxin
- HL-11 Castle Noctorna Map (Blue Chest)
- HL-12 Garnet
- HL-12 220 Gold
- HL-12 Shop Card
- HL-13 60 Gold
- HL-15 Supply Cache (S)
- HL-15 +3 M.Defense (touch wall on pedestal)
- HL-19 80 Gold
- HL-19 +3 Attack (Candle with missing flame)
- HL-20 20 Gold
- HL-20 Felix Laurel
- HL-20 Ring of Purify
- HL-24 Elixir
- HL-24 Ruby
- HL-24 25 Gold
- HL-25 Diamond Shard
- HL-25 Viribus Laurel
- HL-29 100 Gold


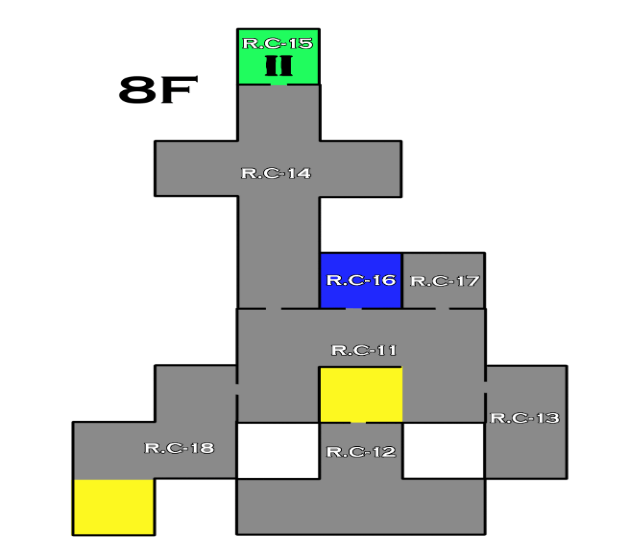
Restless Clocktower Prison
This area is highly condensed and to make any progress, you’ll have to have defeated the previous bosses (minus the arena champion).
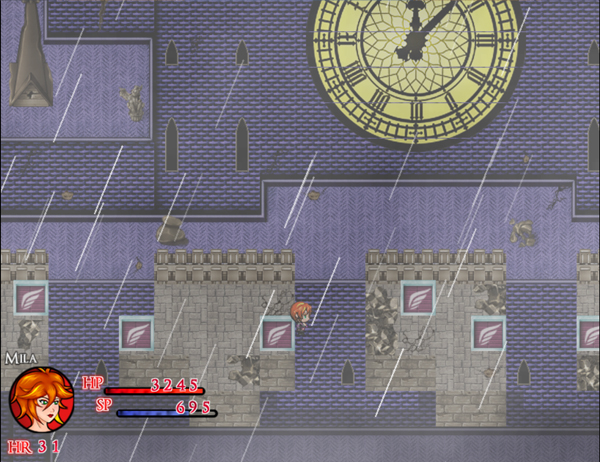
The main route circles around outside the clocktower itself and there are many prison cells that are locked. To unlock them, you need to get the Prison Key, which is found at FA-14 by using the Leap Panels in the area behind it. The items are all optional, but some of the notable ones are Salutis, an additional whip with high attack at the cost of having no buffs and Ancile, arguably the best armor in the game. With how easy it is to warp now, I would say it’s worth the effort to grab these goodies. Follow the stairways up to the top and get ready to confront Gabrielle for the last time
- Gabrielle
- Max HP: 22,000
Gabrielle instantly puts your fight on a timer, so you don’t have much wiggle room to mess around if your level is low. She’s resistant to the Silver Debuff and to Numbness as well. After 10 rounds, Gabrielle will instantly defeat you, regardless of whether you have Faahlda’s skill up or not. Once she’s beaten, she’ll fade away instead of just dying, which is concerning. But with only one more area to clear, that issue should resolve itself shortly! Pic 116 is also unlocked in the Picture Gallery.
Items:
- RC-1 300 Gold
- RC-1 6000 Gold (Chest)
- RC-1 20 Gold
- RC-2 Vulnerary
- RC-3 150 Gold
- RC-3 Castle Noctorna (Blue Chest)
- RC-4 35 Gold
- RC-5 10 Gold
- RC-5 Jade
- RC-5 Sunlite Tea
- RC-7 Ammo Pouch
- RC-7 Shop Card
- RC-8 15 Gold
- RC-8 Amethyst
- RC-8 85 Gold
- RC-9 Praesidio Laurel
- RC-9 45 Gold
- RC-9 Supply Cache (M)
- RC-9 Salutis (Chest)
- RC-12 Fruit Smoothie
- RC-12 Gingerbread Cookies
- RC-12 T-Bone Steak
- RC-12 Clam Chowder
- RC-12 Fried Cod
- RC-12 Supreme Pizza
- RC-12 Spicy Curry
- RC-13 Holy Water
- RC-14 125 Gold
- RC-16 Diamond (Chest)
- RC-18 90 Gold
- RC-20 85 Gold
- RC-20 Celeritas Laurel
- RC-20 Moonlite Tea
- RC-22 Ancile (Chest)


The Apex
We’ve made it to the final area of the last dungeon! This fancy area has the greatest diversity of enemies yet! Before leaving the first room, don’t forget to check the tea cup for a free Mighty Tea!

This area is also home to an item that can greatly decrease the time it takes to grind out levels! From TA-8, activate the stone and then quickly race over to TA-7 and touch the dragon statue to earn the Treasure Monger’s Ring. This ring ups the drop rate of all items, including vampire dust and fangs! Go ahead and scan through the map below and grab everything you can. After this is the last part of the game. Just a few more battles and cutscenes to go!
Items:
- TA-1 95 Gold
- TA-1 Medicinal Herb
- TA-1 30 Gold
- TA-1 Mighty Tea (tea cup)
- TA-2 55 Gold
- TA-3 10 Gold
- TA-3 Supply Cache (S)
- TA-3 20 Gold
- TA-3 Vulnerary
- TA-3 45 Gold
- TA-4 Salutem Laurel
- TA-4 Sunlite Tea (Center Coffin)
- TA-5 Jade Shard
- TA-5 Sapphire Shard
- TA-6 Ammo Pouch
- TA-6 80 Gold
- TA-7 60 Gold
- TA-7 Treasure Monger’s Ring (Chest*)
- TA-9 Medicinal Herb
- TA-10 Moonlite Tea
- TA-11 Castle Noctorna Map (Blue Chest)
- TA-12 Viribus Laurel
- TA-12 95 Gold
- TA-12 140 Gold
- TA-12 220 Gold
- TA-13 Shop Card
- TA-14 Supply Cache (L)
- TA-15 Moonlite Tea
- TA-18 Felix Laurel
- TA-23 Sentimental Doll


Leading up to TA-17, you’ll reunite with Lucy, however it’s too late. She has fully turned and now you will have to face her for real.
- Lucy 2
- Max HP: 30,000
Like before, her resistance to attack is incredibly high. You’ll need to take Faahlda’s advice and strike her with Magna Flash to weaken her first! Once you’ve reduced most of Lucy’s HP, the fight will end abruptly. She will run off as Princess Anja and Ashe catch up to you (Queen Sophia will join too if you complete contract 11). Anja explains that Lucy is actually her sister, Princess Emma and she’s come to try and save her. They go ahead of you and wait in TA-19, which is a recreation of Noctorna HQ. Pic 117 is also unlocked in the Picture Gallery.
The old HQ is worse for wear. There are still a few neat things to see here before proceeding to the final battles. Within Amber’s room, you can find what is left of Captain Samantha Friedrich. She’s been turned into a lowly ghoul. You can put her out of her misery if you want for a free Vampire Dust. In Mila’s room lies the last False Memory for you to fight as well as an innocuous doll that you can pick up. The Sentimental Doll doesn’t do anything, but will unlock an additional scene after the credits roll if you grab it. In the upper floors you can also find Iris, if you saved her earlier.She won’t join you for the final fight, but she will give you a Felix Laurel for luck!
Now all that is left is to face Amber once and for all. After a lengthy cutscene filled with revelations, Amber shows you the power of the Malispheres first hand!
- Amber
- Max HP: 26,000
Due to the power of the Malisphere, Amber cannot be weakened or numbed, much like Gabrielle before her. She will also increase her defenses a bit with a blood aegis. Roughly every 5 turns, Amber will charge up her ultimate attack. You must use the Virgin’s Cross before this or else you will suffer a devastating attack that will likely annihilate you. Once Amber’s health is low, she will activate the Crimson Veil once again. When she does this, use the Virgin’s Cross from your inventory, even if it’s passive effect is active. This will end the fight immediately and play the next cutscene. Once that’s through, Amber’s second phase begins.
- Amber 2
- Max HP: 30,000+
Amber comes right into this fight swinging. If you started the last fight with low HP, heal immediately and cast Summon Faahlda as soon as you can to even the playing field. Amber has a very high attack stat and will only strike you with physical attacks. As you attack her, she will use the spheres more and more to heal and grow stronger. However, the spheres will stop healing her eventually and then all you have to do is survive a few turns until Amber gives up.
Amber collapses from her wounds and she and Mila have a heart to heart. Despite the tragedy of the scene, Gabrielle returns from the shadows to ruin the moment. Like she did to the others, she rips away Amber’s soul and uses it as fuel along with her own body to revive the true ruler of the castle, Alexandria! This is the point of no return, so heal up and tap off your SP with the chest in the last room. Make any last second visits to the shop and pick up items, grind levels if you want. This is the endgame!
- Alexandria
- Max HP: 45,000
The mistress of the Malispheres and wielder of the Crimson Veil herself has finally shown her face. She is a step above Amber in terms of power and fights in a similar style. Every few turns she will activate her Crimson Veil and become immune to most attacks. Use the Virgin’s Cross to blow it away. She also has the same ultimate attack that will tear you to shreds without the cross’ power. If your HP gets too low, Mila’s blood will spill onto Alexandria, which she will drink and gain a small boost to her HP and Atk, so try to stay above 20% throughout the fight. Alexandria can also inflict you with the Pyre Curse which reduces your HP by 15% each turn. This status cannot be removed by healing items, so it can be debilitating. This can be a long fight, but once you’ve reduced most of her health, the fight will abruptly end.
Evidently, Alexandria isn’t very fond of being slapped around by a lowly human. In a last ditch effort, Alexandria reveals the true, monstrous power of the Malispheres as she morphs into her final form!

- Alexandria Ω
- Max HP: 50,000

- Malispheres α, β, γ, and δ
- Max HP: 5,000 x 4
Alexandria starts this fight completely invulnerable. Before you can get to her, you will have to destroy the Malispheres once and for all. With Faahlda at your side, you now have the capability to do so. They each have a specific set of skills that they are weak to. From left to right their weaknesses are Fire, Light, Smashing, Piercing and Silver. They have very little HP so you should be able to destroy them in a round or two. Meanwhile, Alexandria will be attacking you with heavy blows, but at this point, one attack per turn should be manageable.
When all four Malispheres are destroyed, Alexandria will launch a move that reduces Mila’s HP to 1. Before she can land the final blow, Ashe will jump in to help, restoring all your HP and SP as well as joining you for the final part of the fight. Ashe, just as she did before will revive you if you are defeated and will constantly heal herself. Once she is on your side, it becomes very difficult to lose. There’s no bad ending if you lose to this form of Alexandria, so just hit her with everything you’ve got! With that done, congratulations! You’ve cleared Crimson Veil’s main campaign! Enjoy the final cutscene and credits. You’ve earned it!
Once the credits roll, you’ll be returned to TA-20, just before the fight with Alexandria with Pic 118-122 unlocked in the Picture Gallery. With the final boss cleared, you also have access to the Theater of Inevitability! Here you can view all of the game’s bad endings whenever you want! Have fun indulging in your favorites!

This is the end of the main story!


Be the first to comment